Saturday, November 14, 2009

Custom French Sillouette Art just in time for Christmas!


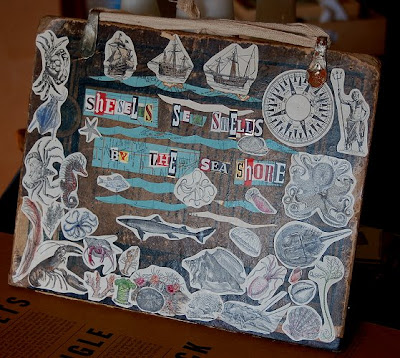
I've added a new custom, French inspired digital product over at my etsy shop. I used several vintage items from my ephemera collection to achieve this layout. Check it out here.

Also, I've got some upcycled items that I will be adding to the shop soon including some altered art pieces as well as some custom notebooklets made from vintage paper and book covers. be sure and bookmark my etsy shop and check back soon for the new items!

More Soon,
The Upcycler

Tuesday, September 1, 2009

A Numbers Game


Mrs. Hughes and I have been fascinated with old printer's block stamps for some time now. We picked up a handful at the State Fair Flea Market a while back and used them as decoration in the house. There are several on the book shelves in the library just sitting pretty, but with no real purpose.

While on yet another trip out to Miss Linda's and her array of antiques {and wasps} we dug up a bin or two full of these old printer's blocks. Originally used to typeset ads, newspapers, and such by hand. I would guess these were carved by hand as well. Mrs. Hughes was looking to spell out a specific phrase on this outing "All you need is love, love is all you need" the Beatles of course.


I spent a good 30 minutes digging through the letters to find the ones we needed, my hands covered in 80+ year old newsprint ink after the fact. Once we got them home I got the idea to attach them to some old wooden hand stamps I purchased a while back at another shop. I figured it would be easier for her to use them if I grouped each word together onto one stamp. Those came out very well and she will be using them on items for a forthcoming Etsy shop.


Which brings us to this numbers set. After putting together the All You Need Is Love set I got the idea to do an all numbers set complete with a period and dollar sign. My thought was price tags. I can just see these on those big toe tags hanging off of vintage furniture. So, back out to Linda's. I was already headed out that way to pick up some items we had on hold. Miss Linda only takes cash you see, and anytime we show up with $50 we find $100 worth of good stuff.

So back through the letters I dug until I found 0-9. I can use the 9 as a 6 as well, so that saved me having to make 1 stamp. After finding my numbers I was rummaging through a booth and came across a Ziploc bag full of old wooden thread bobbins. BING, it's funny how simple things can escape you, It never occurred to me before then that a bobbin makes a good handle, although I am sure someone has cut them in half and used them as furniture knobs.

What a long post for such a simple thing! I attached the wood printer blocks to the bobbins with some 2 tonne epoxy mix. I will give you a hint. The kind that takes longer to set and cure doesn't have any odor at all, at least not the brand I bought. On the other hand the fast curing stuff, like under 5 minutes, stinks, stinks, stinks. I used the slow setting stuff. First I scrapped the remaining paper labels off of the bobbins, and then sanded off the glue that held them on. I mixed my epoxy and gooped it on heavily, making sure to get some on the edges of the blocks, I think this will keep them from rocking loose off of the bobbin back and forth as they are kind of high.

Most hand stamps have a piece of rubber between the stamp and the handle. I didn't bother with this because the epoxy dries so hard that it would have killed any give in the rubber. Instead when using these you can just put an old towel or some paper napkins under what you are applying the block to. Since these are wood faced and very hard they work best on smooth surfaced paper, card stock and fabric with a high thread count. They don't work well on hard surfaces with no give I've discovered, you need a little bit of give and wiggle for the paint or ink to transfer properly.

For the sample letters on the photos I used an old, small paintbrush to apply the paint to the surface of the letters. That is where the lines came from in the final product. And since the paint won't be brushed on the same way twice, they will always look a little different.

Cleaning is easy as long as you are using water soluble paint or ink. Just a run under the sink does it. I would keep the water off of the bobbin end though or seal them because they are pretty porous while the print blocks themselves are very dense and pretty much waterproof.


Well have fun making your own bobbin/printer block hand stamps. I think I will head out to Miss Linda's this weekend and see if I can't find the whole alphabet.

More soon,
The Upcycler.

Monday, August 3, 2009

The Upcycler At Scarlett Scales in Franklin, TN


I stopped by Scarlett's unannounced with a beat up suitcase full of upcycled stuff on Friday. We had been talking about her carrying some of my stuff for months and I had to stop by to pick up a bed frame we bought there last week. She was very excited to see the items and picked out several to try in the shop including this paper flower brooch, several handmade books, and a few other items. The brooch is made out of vintage paper and is what I call a "fairweather flower" as I don't like spray sealing them, so they don't do well in the rain. The brooch pin back is held on with with a piece of vintage book leather.

I packaged it up as pretty as I was able in an old freezer tin, some twine, a page from a french catalog as tissue, and included a handmade gift tag. There was a lady in the store when I was showing my wares that just had a fit over it, so hopefully it will sell and I will be able to keep some items available at Scarletts, its an honor to have my stuff in there, she runs an awesome shop.

More soon,
The Upcycler

Tuesday, July 28, 2009

Where has the Upcycler been?

The answer is simple: Out in the backyard.
Mrs. Hughes and I have been working, working, working out in the backyard for several months now. We have had a deck built, a pergola, a fence, we've planted 11 good sized trees, dug huge flower beds and just had ourselves a good time. I also moved 7 cubic yards, a very big pile, of dirt from the front your to the backyard to fill the beds and to build boy a small raised garden. We planted pumpkins for fall last week and they are already coming up.

While the backyard isn't exactly an upcycling project, I have had some time to work on that as well. I opened an etsy.com shop and have begun selling digital downloads of pages I've scanned and cleaned up from old catalogs, notebooks, etc... I will be adding much more in the future, but for now there are several pages from a French homewares catalog from the 1920s. These are great for scrapbooking or creating personalized crafts. Here is the link to my etsy.com shop:

www.theupcycler.etsy.com

I plan on adding some vintage items to the shop as well, but that probably won't happen until after our CRAFT ROOM project, which Mrs. Hughes will BLOG ABOUT I am sure.

Next blog I will be sure and take pictures of the old pieces we've placed in the backyard. Last week we found an awesome iron headboard from Scarlett Scales Antiques in Franklin, TN. As soon as I figure out how to get it home it's going in the raised garden box.

More soon!
The Upcycler

Monday, June 15, 2009

I SWEAR this book followed me home.


About a year or so ago Mrs. Hughes and I went to a new antique shop in Nolensville, Tennessee. It's in an old cinder block church building on a hill. I think it's called Hill Top Antiques. While rummaging through the rooms I came across this Pro-Prohibition tome from the turn of the century.

"The Curse of Drink, or, STORIES OF HELL'S COMMERCE."

The book cover and title alone where enough to make me want it. But when I flipped through the pages I saw this AWESOME illustration that I thought would make a great poster. At least I thought I saw it. I flipped to where the prices usually are on books in antique stores, on the top
right of the first blank page in pencil, and was wowed to find a price of $2.00 SOLD.

I went to check out and when the clerk saw the price he became sure that the book dealer who's booth I pulled it from didn't intend to sell it for $2.00 but that was probably what HE paid for it. So I asked him to call the guy to get the price, nicely, he was out of town. So, I left my name and number and asked him to call me with the price, which he did about a week later. $15.00 which was fine with me. For some reason however I never got back to get it. When we finally went back through the shops in Nolensville about six months later I searched for it but couldn't find it, and assumed it had been sold.

SO yesterday Mrs. Hughes and I are back in Nolensville and we go to Hill Top. Two minutes in the door and the book turns up sitting right in front of me. Without looking through it again I've got it in my hand headed for the checkout. Again it wasn't marked, but I was in luck as the dealer on duty for the day was the book dealer. He remembered giving me a $15 price on it from a year ago. I asked him if it had been in the shop the whole time and he said he had actually taken it back and forth from home a few times looking at it and had only recently brought it back.

Now it was just as easy as paying for the thing. Then of course Mrs. Hughes and I remembered that the place only takes cash, and we didn't have a dollar between us. I asked the dealer to hold the book and that we would be right back. We made a quick run up the street to an ATM not associated with our bank where we were promptly charged a $3 convenience fee to take out $20.00, DO WHAT? Did it anyway. I ran back in the shop and paid, got the thing home and was looking through it last night and there is NO TRACE of the illustration that I wanted to blow up as a poster. DAMN.

In my head there is an image of the illustration. It's done in pen and ink and it depicts a snaking line of men raising beer mugs and shot glasses going from saloon to saloon in perspective. So in the back the line is small and far away, and then towards the front they are larger, oh, and, they are falling into a big pit in the ground with a sign next to it that says HELL.

Apparently I spent a year in my head collaging five different illustrations, plus the cover, together to form this perfect image of an awesome poster that would look fantastic over someone's home bar. That's what being creative will get you.

So was it all in vain? I'm going to say no. Now that I've flipped through this thing 20 times, I even checked the page numbers to make sure the mythical illustration wasn't ripped out, I've decided that I am just going to start scanning in all of the different parts and then I'm going to collage them together in Photoshop and just see what I get. It may turn into total crap but at least I will finally get to see it on paper the way it all combined in my head.

I will post a blog about the finished product, unless it doesn't go well, in which case you will
never hear about it again.

Thursday, June 11, 2009

Vintage Ephemera Wall Art


I’m at it again with the paper and books. I’ve got so many old ones lying around that I’m constantly trying to come up with new things to do with them. This time around I’ve used several old book covers as “frames” to hold old postcards as well as “collections” of clipped etchings from old encyclopedias and the like. Flipping through an old encyclopedia it occurred to me that it might be fun to group like etchings together. So I’ve done that with birds, insects, sea animals, etc… What emerges is a piece of art that seems to be an educational aid like you would find hanging in an old school house.

I’ve also used some great old postcards. I really like to come across the antique postcard books that are from a specific area, Italy is always fun, so is France. I found a set of 24 in a booklet from Versailles a while back and have used some of those for these items. There is even one of the Eiffel Tower.


The construction on these is pretty simple. It boils down to ripping the covers and backs off of old unused books. Personally I like using the good and abused books for this. The wear and tear on them adds great character as do the ink and water stains that appear on several of them. I like to layer them to give it more of a frame and matt kind of look. I just use wood glue to hold those together, I also use it to stick the postcard in place. If I’m doing a menagerie of etchings I like to use good ol’ Mod Podge.


Once I have them all glued together I like using the ends of old flatware bent into a “U” shape has clamps for the tops. I then run strips of fabric trimmings through them to use as a hanger. These look great on a wall or hanging off of a door knob. I would guess you could easily make them into OPEN and CLOSED signs for shops to hang in the window.


Please email me at cj@theupcycler.com if you have an interest in purchasing one of these. I can let you know what themes I have available and the sizes. I can also do custom hangings, all I need is a theme and size requirement.

Vintage Ephemera Notebooklets


Paper, paper, paper. My “office” AKA the place I keep my paper, is over run with old catalogs, encyclopedias and the like. Mrs. Hughes is to the point of barely tolerating my paper pack ratting. While flipping TV tonight, real men don’t watch they flip, I paused for about 3 minutes on a show about hoarders. People with such a compulsion for obtaining things that they will drive down the street ahead of the garbage truck and pluck out “finds.” It made me think of all of the time I’ve spent digging through boxes and shelves at little antique stores looking for a cheap book with a leather cover that I can rip apart and make into, yes, another book.

And so it goes, I’ve got old paper that’s not good for much unless it’s remade into something else. The encyclopedias are awesome to flip through as they are filled with etchings, but most of the information can be found with a few clicks online. Not to mention that the books themselves have seen better days, usually they are falling apart by the time I find them. So sitting and looking through my pile one day I started to notice that there were a lot of blank pieces of paper in them. At the front of the book were a few blank pages, then at the back, then the etchings where blank on the back. So I started ripping them out with the idea of creating little notebooks made from what I call “blanks.” I used the covers off of old books as well as the cover for my notebooklets as I call them. They are bound with post screws, which allows for them to be filled with more paper once you start to run low. The covers are hinged to make them easy to open. I’ve hinged them in several different ways but my favorites are black ribbon or the little twist ties that come with garbage bags. Finally a use for those things.

Below are a few samples of my notebooklets, they average about 3 inches wide by 4 inches tall and contain around 35-50 blank pages. They are small enough to fit into most purses. I hope to have these in a few shops around town soon, Scarlett over at Scarlett Scales Antiques, scarlettscales.blogspot.com, has expressed some interest in carrying them. I’ve got a pile of them on the window sill waiting to be finished up. My thought on it is, I might not make much on them but at least I will get some of this paper out of here. Which will make Mrs. Hughes happy, and that’s really what it’s all about.

If you would like to buy one of my notebooklets drop me a line at cj@theupcycler.com I’m still working on the website but we can do it through email. They run $20 each and include the shipping within the United States. I take PayPal or good old fashioned checks through the mail. Please also contact me if you have a shop and want to carry anything you see on my blog.
I’ve got to get some of this stuff out of the garage!


Friday, May 29, 2009

Custom Upcycling - Appointment Notebook


Paper is one of my vises. I have boxes and boxes of old books, yearbooks, catalogs, encyclopedia pages, journals, handwritten letters, ledgers, etc... there are just so many things you can do with it.

When I was working on a client's site a few months ago I happened to show her an image of some upcycled notebook journals I had made using old book covers and the blank sides of encyclopedia pages. She liked them so much she asked me if I could create an appointment notebook for her from a vintage ledger cover she had. She needed something that she could add paper to to keep up with her custom jewelry inventory.

I used a fabric scrap for the binder. The corners are covered in old book leather and the clasp is made from the ends of two old pieces of silverware that I bent into U shapes. The book is held closed with a bobby pin. The barrel screws make it easier for her to take the back off of the book and add pages to it as needed and I also included a vintage paper pad for jotting down notes.
She liked this one so much that she asked me to make several journals to give out as Christmas presents.


I enjoy doing custom work with materials provided by customers. If you have old book covers, journals, or any kind of old paper lying around that you would like turned into something unique feel free to email me at: cj@theupcycler.com to discuss your project.

Friday, April 10, 2009

Hand Ink Stamp Pencil and Note Holders

I ran across a box of old wooden handled hand stamps at the antique store here in town a year or two ago and they were so cheap I had to buy the whole lot. The actual stamp parts on most of them where gone, so it was a smooth surface, which gave me the idea of mod podging something onto the faces of them, and sitting them upright like a little piece of art for a shelf.

On some of them I applied pieces of old maps from an outdated atlas along with illustrations cut from old encyclopedias. I then applied phrases with bright letters cut from unused beer labels,
I found them on ebay and now have about 2000 of the things.


On others I attached some vintage fabric dye labels, another ebay score. They have everything on them from birds, pictured, to one that shows an Indian woman being mauled by a Tiger.
I supose that's what sold fabric dye in the 1800's.


This was a really simple and quick project but when I got done with them I was a little bothered by the fact that they really didn't have a purpose, they didn't seem to BE anything. So, I took them out to the garage. I drilled holes in some and made pencil / pen holders, and then I used looped wire on others to make business card / note holders. I like them much better now that each of them has a purpose, and they look pretty dang cool to boot.

Wednesday, April 8, 2009

Picture Frame Terrarium - Mini Conservatory


About a year or so ago Target had this awesome little metal terrarium for about a week. That's how Target is, if you don't get it when you see it, it won't be there next time. I had planned on buying Mrs. Hughes one but didn't get to it in time. Since then I had been thinking on how to build one for her and one day it occurred to me that it would be much easier to make if I didn't have to cut glass or figure out a way on how to get the glass to fit and stay within the frame. Basically, I wanted a lazy man's terrarium.

It took me some thinking but I finally realized that picture frames would be perfect, if, there was a configuration of them that would work without having to alter their shape. I got messing with the numbers and realized that if I used an 11"x14" frame for the sides, that an 8 1/2"x11" document frame would work for the ends. Then I guessed that I could use 4, 5"x7" frames for the top. My only real concern was how to get them all to fit together and be a solid structure.

I took a trip to Goodwill but had trouble finding the 11"x14" frames or the document frames. But I did manage to find two 10"x13" frames, which meant I could use the more common 8"x10" frames for the sides. I searched and found 4, 5"x7" frames pretty easily. For this terrarium I used all wood frames with a similar style, but I would guess you could use all metal ones if you could find them.


Through some trial and error I figured out it was hard to nail the frames together with my nail gun due to the angle that was on the back of them. I wound up just kind of tacking them together with the nail gun and then I used clear silicon to adhere them. I made an L shape out of one of the big frames and one of the side frames, did the same thing again and then attached the two Ls together. Then I put a tonne of silicon on the small frames and leaned them to create the top, I used a square dowel at the peak to even everything out. The glass was removed on all frames to make putting it together easier.


Once the silicon dried I filled in all of the cracks and spaces between the frames with wood filler, I used a lot of wood filler. Especially between the roof and the walls. I then gave it several coats of white paint with a large brush and let it sit for a few days. The handles were attached before I painted, they are just dresser drawer handles. I painted over them as well. Once everything was dry I put the glass back in from the opening on the bottom. This took a little work and I was just lucky that the way everything went together didn't block where the panes went back in. I used silicon around the edge before putting the glass in, and then I used silicon on the other side of the glass as well. I used a caulk gun for all but the last large pane, my gun wouldn't fit in the box anymore so I had to just use my finger for the last one.

Once the paint dried I went over it with a coat of dark furniture wax. I rubbed most of that back off using Goo Gone until I got it to the color I wanted.


I plan on building a crown molding base for this, I just haven't gotten to it yet. Once I get them written out I will post full instructions for making this on www.theupcycler.com

More soon! ~ The Upcycler

Monday, April 6, 2009

Mason Jar Lantern, Glass Insulator Lantern


I bought a couple of old blue mason jars with zinc tops at the antique store down the street recently with the intention of cutting the bottoms off of them to make cloches. Turns out cutting glass is hard, duh. So, I didn't get too far on that upcycle. However, Mrs. Hughes and I were in the herb shop down on main street in Franklin this past weekend and they had some awesome glass globe lanterns with black metal hoop handles. They instantlly gave me the idea to turn my mason jars into lanterns.

Honestly I thought it would be a pretty easy thing. I decided to use a metal coathanger instead of going to Home Depot and purchasing wire. Cutting and straightening out the coathanger was pretty simple. The hard part came in bending the round part that went around the lip of the jar. I had to bend it in a circle plus add two little openings for the handle ends to fit through, then, I had to fix it to where the two ends of the round piece met and hooked around one another tightly, since this bangle around the jar lip is what would hold the handle in place, and, it would be hung from it's handle.

I happened to have some craft wire from an old project that is covered in what I believe is hemp. I think they use it for branches for floral arrangements. I wrapped the handle to my lantern with that, but you could probably use actual hemp, or maybe even rafia. A good coat of wax over it would probably waterproof either well for use out doors.

You will need something to sit on the bottom of the jar to act as a wax catch for your tea light or candle. I used an aluminum cupcake wrapper, I tried to use a baby food jar but it was a hair too big to fit into the opening of the jar. If you melt the bottom of the candle a little and then sit it on the wrapper first it's a lot easier to get both into the jar at the same time. Remember to remove the paper part of the wrapper.
For what appeared to be a simple little project bending wire just the way you want it can take some time. I think this turned out great though and plan on making several more. After showing it to Mrs. Hughes she gave her approval. I was sure that she would deem them too country for use around our house/back porch, etc... but it looks like this is one upcycle we will get some good use out of.


After completing the Mason Jar Lantern I remembered an old glass utility pole insulator that I had bought a while back and thought it might make a good lantern as well. Turns out I was right, actually, a tea light fits into the hole perfectly. If you decide to make either one of these lanterns I would suggest that you add a piece of wire or twine to the top to tie the handle to the hook you hang them on. They are pretty heavy, the insulator is actually heavier than the quart mason jar, and would hurt pretty good if one fell and conked you on the head.

PLAN B If you aren't inclined to cutting and bending wire, few are, then here is another great idea for mason jars, or, any jars you have around the house. I actually saw this in Southern Living last month in use on a farm table for a picnic, except they used a handmade wood box instead of a soda pop crate.
Find yourself an old soda crate, any brand will do as long as it's wood and doesn't have a lot of dividers in the middle. Open in the middle is best. Collect up all of your old unused jars or half empty jars from the fridge. Old flower vases that you aren't protective of work well too. Fill the pop crate with the vases, jars, bottles, even metal vegetable cans with the labels torn off work, and arrange them to your liking. Now head down to your nearest field and pick some wild flowers, or cut a few Dogwood limbs, Saucer Magnolias, etc... you get the idea.

More soon,
The Upcycler


Thursday, March 12, 2009

Dragonfly Brooch


This is one of the first things I upcycled, before I even knew what upcycling was. I had already started buying old books, so I had the book leather. The wings are from a Diet Mountain Dew plastic bottle, the frame of it is made from floral wire and the eyes are two green, faceted, glass beads that I swiped from my wife's beading drawer. I took a series of pics as I was making it,
I guess so I would remember how if I ever wanted to make another one. So here those are with some basic instructions in case you want to make one of your very own.


The first image, above, shows the completed wire frame. The total length of the pin is about 5 inches. Basically I started with two pieces of wire about 10 inches long, I made an X with them and crossed them over eachother to get the head and body shape. It took a little work to get it fat towards the head and thin towards the tail. Once I got to the tail I just twisted the ends together. Then i took another piece of wire and looped it around the outside of the frame. The "eyes" were tied into place using thin strips of plastic from the Diet Mountain Dew bottle. To get these you just cut the top and bottom off the bottle with scissors, then you have a tube, you cut the tube open and you have a rectangle. You cut a strip off of the longer part of the rectangle that is about a quarter of an inch wide, then, cut that strip in half and you have some tiny strips. Depending on the hole sizes of your beads, you may need to cut them in half again. It's easier to cut a larger one in half than it is to try and cut a thin one from the rectangle in the beginning.
I also put a dab of hot glue on the eys as I set them in place just to be safe.


In the second shot, above, you can see a full piece of old book leather, more on that in a minute. Also present are the wings, notice that this is one piece. Using the rectangle of plastic from the bottle I cut out what is basically a vertically flattened X and then rounded off the ends. I made the top wings a little bigger than the bottom ones. Then, using an exacto knife I scored the dragonfly wing pattern into each wing. It's a lot easier than it sounds, you just score one or two large horizontal lines, and then you score several dozen vertical lines off of that, similar to the veins in a tree leaf.

I don't have a picture of the attaching of these, but it comes AFTER the next step, wrapping the frame in book leather.


The trick for getting old book leather off of the cover of an old book is to soak it it warm water. The leather was glued onto pasteboard/cardboard most likely and will be easy to pull off once it soaks for a little while. be warned though, the leather will get very tough once it dries as it's very thin. So it's best to work with it while it's still wet. For the above image I cut a few long strips from the book leather and tightly wrapped them around the frame of the dragonfly. It will kind of stick to itself on the ends, which is good, because you can't hot glue the ends until AFTER the leather has dried. I also cut a butterfly bandage shaped piece of leather and put it over the head of the dragonfly longways, making sure the eyes are still visible. So one end of the "bandage" covers his forhead and wraps around his mouth, while the other end covers his chin and the underside of his head. You can use a little wood glue to get this to stick, then wait for it to dry and come back with some hot glue to finish.

Well I wish I had taken more pics but that's all you get. To finish it up you take two thin strips of the leather and tie the wings on at the top, leave the strips hanging and you have yourself four legs. Then taking another butterfly bandage shaped leather piece cover up the top of the wings where they touch the frame. Don't forget to tie in a safety pin on the back, you can either insert the back part of it when you are wrapping the frame in leather, or you can tie it on there using the same strips you used to tie on the wings, a dab of hot glue will keep it all in place. As a final touch I turned the exposed ends of the floral wire at the tail into little loops and dabbed on some wood glue as the covering over the wire will fray off otherwise.


If you want to make one of these and get stuck drop me a link at cj@theupcycler.com and I will give you some pointers.

More soon! ~ The Upcycler

Welcome to my world

What is Upcycling? ~ To put it simply, upcycling is taking something old and unusable and transforming it into something usable.

I have 4 recycled tote bins in my office closet filled with old paper. Seriously. My wife can't stand it. What's in there? Well, two nearly complete sets of encyclopedias from the 1920's to start. A 4 inch thick pile of printer plates from a book on wild flowers, at least 4 atlases, french poetry books from the late 1800's, lots of cuttings from different books and magazines, it's pretty crazy in there. And that's just the paper of course. Out in the garage I have about 40 11"x11" wood trays that were pulled from a handmade mechanic's tool locker. I've been turning them into valet trays, candle trays, etc.. And then you have the box of skeleton keys that are destined to become wind chimes, the door knobs that are now curtain hold backs, the old book leather that I like to use on lots of things, cigar boxes, old metal boxes, it's all pretty exhausting really.


But, each piece was bought with one purpose in mind. To make it into something else, something beautiful and/or usable. The books are all falling apart or stained so I have no issues with ripping pages out of them and reusing the covers for notebooks or journals. And everything else is just waiting to become part of something new. My wife's weaknesses are ironstone and mercury glass, but mine will always be paper, or ephemera as it's called in the collecting world.

As a way of purging some of my materials I am starting THE UPCYCLER. It will be an online reference site for others wishing to upcycle items and I will also sell items that I have re-purposed, and will throw in some vintage one-off items to boot. Paint by number Jesus anyone?

The main website will be www.theupcycler.com while the blog attached to it will be here. Please follow my blog, I will be adding pictures of newly upcycled items as often as my business, www.logodesign-webdesign.com, my wife, www.vintagejunky.blogspot.com, and my boy allow.

More soon ~ The Upcycler

Testing 1, 2, 3

This is a test of the upcycler blogging system. This is only a test.


This has been a test of the upcycler blogging system. Had this been an actual upcycler blog it would have been much more informative, longer, and possibly entertaining.